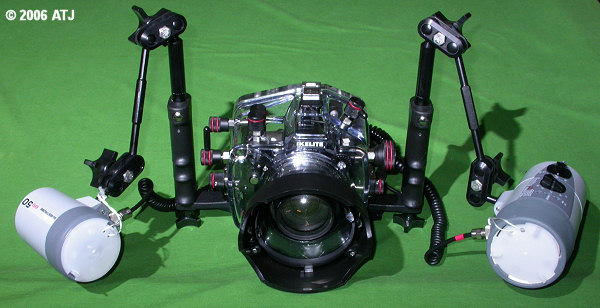
Figure 1: The housing and strobes with camera.
On 17 May 2006 I received the underwater housing and second strobe for use with my Nikon D70 digital SLR. On Saturday 20 May I took it for its first dive. Here are my first impressions of the Nikon D70 with Ikelite housing and Ikelite DS-50 and DS-125 Substrobes. This is only after one dive with poor conditions and using a iTTL strobes.
Nikon D70 Digital SLR Camera
Nikkor 18-70mm ED-IF AF-S DX lens
B&W +4 Diopter Close-up lens
Ikelite Digital Camera Housing for Nikon D70 (#6807.1)
Ikelite 6" Dome Port for lenses 8.9-11.4 cm (#5503.55)
Ikelite Substrobe DS-50 (#4044)
Ikelite Substrobe DS-125 (#4046)
Ikelite Deluxe Strobe Arm Systems (#4086.61 ) for each strobe.
Ikelite Dual Sync Cord (#4103.52).
The housing comes with a zoom and clamp set to fit the zoom lens. This enables the lens to be zoomed while in the housing.
Preparing the housing was pretty straightforward, although more involved than the housing for the Coolpix 4500. The camera has to be prepared first and then placed into the housing without the dome port. The dome port is added last.
I started by removing various accessories from the camera and lens: eye cup, LCD protector, strap and lens hood. A freshly charged Li-ion battery was put in the camera, along with a formatted 1GB SanDisk Ultra II CompactFlash card. The camera was set to manual mode.
I removed the back 'O'-ring and cleaned it and the housing using a clean handkerchief. I lubricated the 'O'-ring with a small amount of Ikelite silicone grease and placed the 'O'-ring on the back panel of the housing. The camera was placed on the mounting tray connected to the housing back and fixed with a small screw into the tripod socket. The hot shoe connector was placed in the hot shoe of the camera. After checking that all the controls were line up and functional, I placed the back onto the housing and closed the holding clips. I checked that the 'O'-ring was sealed all around the back of the housing. The darkened area where the 'O'-ring was compressed was consistent all the way around. I turned the camera on and was able to access all the controls.
The housing comes with two sets of zoom clamps/sleeves. The zoom clamp #5509.28 fitted the lens the best, but the zoom sleeve #0073 fitted better than #5509.28. With the lens protruding from the front of the housing, I fitted the zoom clamp over the zoom ring in the lens and fitted the zoom sleeve over the clamp. I pushed the gear sleeve down until the gear teeth were engaged with the teeth on the housing gears.
I removed, cleaned, lubricated and fitted the 'O'-ring to the back of the lens port and pushed the lens port into the housing. I locked the port in place with the two port locks and checked the seal as best I could.
I connected the dual sync cord to the back of the housing and then to each of the strobes. The DS-125 was connected as the primary strobe and the DS-50 as the secondary (red band on the cable). I then mounted the two strobes with ball-socket arms to the handles on the housing and the set up was ready to go.
Figure 1: The housing and strobes with camera.
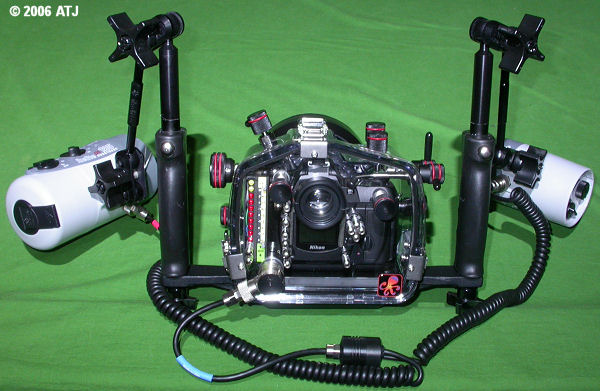
Figure 2: The housing and strobes with camera from the rear.
After a few test shots,the camera was now ready for the dive the next day.
Just before heading to the water, I took a photograph of one of my dive watches. This allowed me to check everything was working and also synchronise the clock in the camera with my watch so I could determine the depth of each photograph on the dive.
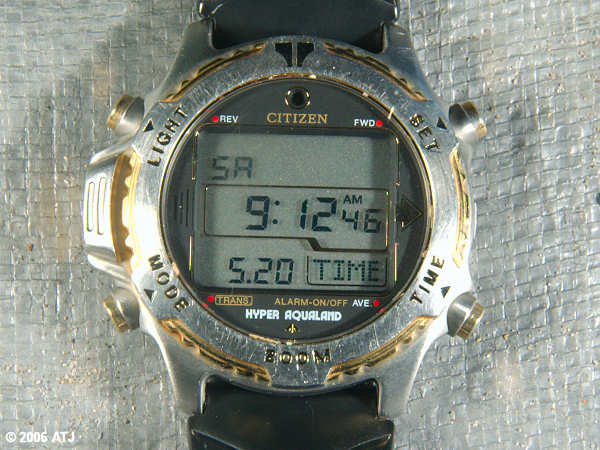
Figure 3: The photograph of my dive watch was saved at 10:12:45, a difference of only 1 second.
Diving conditions were only average. Being within Sydney Harbour, there was little water movement, however, the visibility was poor. It was overcast for most of the dive so that further limited visibility and on the whole the dive was dark. The poor visibility meant that photos could only be taken in close proximity as there was too much loss of quality with distance and also more back scatter.
For details of the dive, see 20 May, 2006 - Camp Cove.
Underwater the set-up is meant to be neutrally buoyant, but was probably slightly positively buoyant. It was very easy to use with a hand on each handle and easy access to the shutter release lever with my right index finger. It did not take long at all to get used to the shutter release lever.
I found the viewfinder on the camera to be quite easy to use, much easier than I thought. It was much better than having to use the LCD panel on my Coolpix 4500. It was so much easier to compose shots. It was also much easier to aim the focus points on the subject so almost all the shots I took are in good focus. The instant shutter release is so much better than the lag on the Coolpix.
It was very easy to adjust the zoom settings on the lens from 18 to 70mm and back or anywhere in-between. I only attempted this while viewing the camera and housing from above. I still have to try it while looking through the viewfinder. I was also able to adjust the shutter speed and aperture without much difficulty.
The strobe arm system was much easier to adjust than the one on the older set-up. I wish I had gone with a ball-socket set-up previously.
Exiting from the water via the beach was quite easy. I was able to remove my mask and fins while still holding the camera.
The results of the first dive were very pleasing, despite the poor visibility. The poor visibility and a fair amount of particulate matter in the water affected some of the photographs.
As with my previous set-up, I can use my dive watch synchronised with the camera to determine the depth of every photograph.
Most of the photographs were well exposed and all were in focus, or very close. Contrast was a little low on some, but that may be due to the visibility.
All the photographs were taken in RAW format to allow more flexibility for post processing.
Here are a few photographs. More can be found in the dive details (link above).
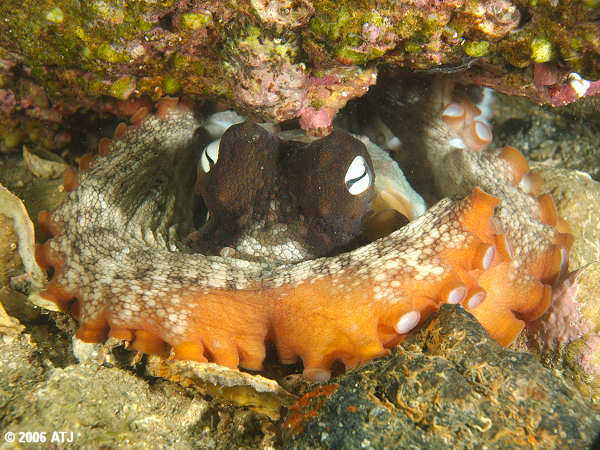
Common Sydney octopus, Octopus tetricus, at 3.4 m.
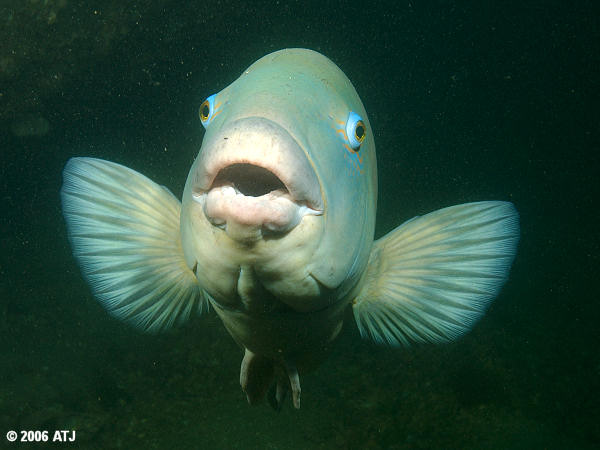
Eastern blue groper, Achoerodus viridus, at 4.5 m.
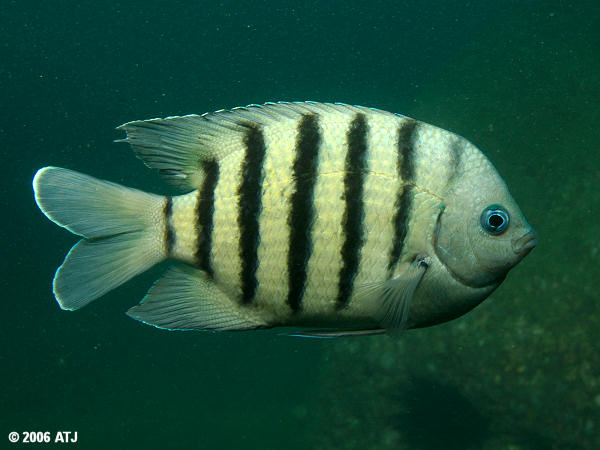
Abedefduf bengalensis at 4.4 m.
Last updated: 26 May 2006