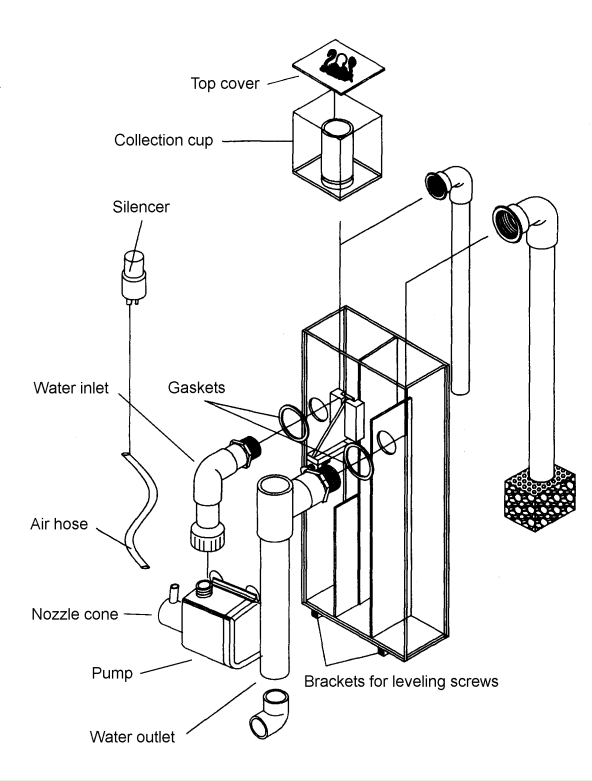
Figure 1: Assembly diagram for BH-100 Skimmer. Note this is a mirror image of the diagram shipped with the skimmer.
I purchased an Octopus BH-100 hangon skimmer off e-Bay but found I needed to make some modifications. The first modification was needed because of the pump had no strainer and was too powerful. The second set of modifications allow the skimmer to be used without having the large pump in the aquarium.
The skimmer itself is nothing special, but for $150 delivered I wasn't expecting the best darn skimmer out there. It has a fairly simple design as shown in the assembly diagram in Figure 1.
Figure 1: Assembly diagram for BH-100 Skimmer. Note this is a mirror image of the diagram shipped with the skimmer.
The skimmer is designed for aquaria without sumps and it hangs to the side or back of the aquarium. The pump hangs in the aquarium and can push water into the skimmer. Water flows back to the aquarium via gravity. It is a sort of reverse weir/sump.
The pump has a nozzle cone (Figure 2) which draws water from the aquarium as well as air which is sucked into the modified impeller (Figure 3) of the pump. The impeller chops up the air to produce water with very fine bubbles which is pumped into the reaction chamber of the skimmer which has a collection cup mounted above it. Water then passes over, under and over a series of baffles to try to shed most of the bubbles. The water finally flows through a sponge before going into the outlet which takes the water back to the tank. The sponge is to further restrict bubbles entering the tank. Unfortunately, some bubbles still enter the tank and additionally the sponge may collect debris which will be difficult to remove.
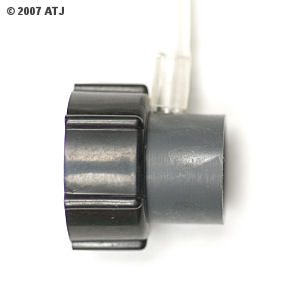
Figure 2: The nozzle cone.
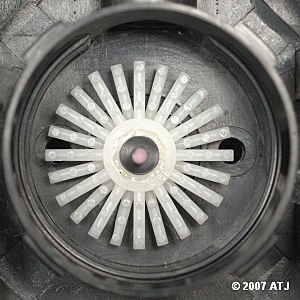
Figure 3: The impeller.
When using the skimmer straight out of the box I found that the pump was too powerful and the in flow was faster then the out flow causing the skimmer box to overflow. Additionally, there was no strainer on the inlet of the pump which sits in the tank. I resolved this problem by fitting a strainer which also restricted the flow.
The nozzle cone on the intake of the pump has the same outside diameter as 20mm electrical conduit. The inside diameter of 16mm clear vinyl tube also fits snugly over nozzle. I used a short length of 16mm clear vinyl tube to connect the nozzle cone to a short length of 20mm electrical conduit with an end cap fitted. I drilled 1/8" holes in the end cap until the flow rate was high enough to get good bubbles but not too high as to overflow the skimmer. The cap was held in place by wrapping some plumbing tape around the end of the conduit to make a snug fit. Figure 4 shows the completed strainer/flow restrictor and Figure 5 shows it in place on the pump.
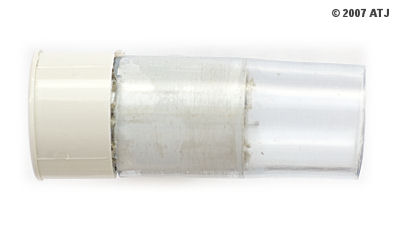
Figure 4: The DIY strainer/flow restrictor.
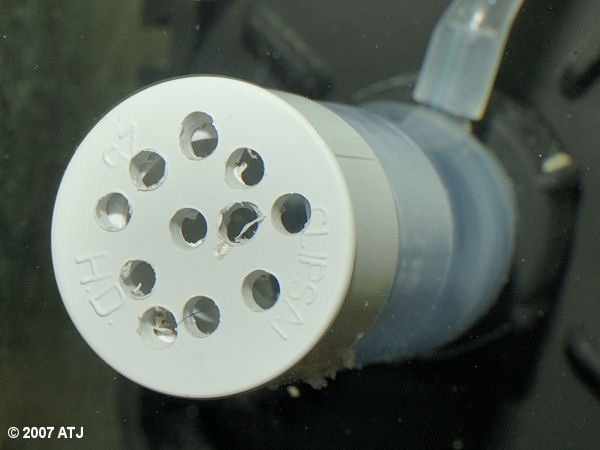
Figure 5: The DIY strainer/flow restrictor on the intake of the pump on the BH-100.
The strainer/flow restrictor successfully prevents the skimmer from overflowing while still allowing for sufficient flow and air injection to produce satisfactory skimate. Figure 6 shows the amount and colour of skimate after 48 hours of operation.

Figure 6: The collection cup after 48 hours in operation.
I'm using a BH-100 with the first modification on the frag tank.
The supplied pump is very large and takes up a lot of space in a small tank. I plan on using one of these skimmers on a 60 centimetre (2 foot) tank and the pump is just too large. The second set of modifications allow me to run the supplied pump externally by plumbing it to a smaller pump that will be placed in the tank.
The first required modification is to the supplied nozzle cone. The air feeds through a hole on the flange that connects to the pump. As the pump will be external, the supplied gaskets are required to seal the connections to the pump, however, the gasket blocks the hole on the nozzle cone flange. It is necessary to cut the hole right down to the inside of the nozzle cone so the air will clear the gasket. I was able to do this with a hobby knife by just making small nicks in the edge until the hole exposed to the inside of the nozzle cone was around the same size as the hole in the flange (Figure 7).
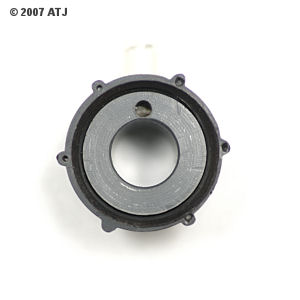
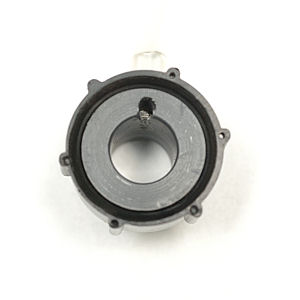
Figure 7: Before (left) and after of the modified air inlet inside the nozzle cone.
As mentioned above, the outside diameter of the nozzle cone matches that of 20mm electrical conduit. This means 20 mm electrical conduit do construct and inlet extension to plumb the pump to the smaller pump in the tank. Three solid elbows and lengths of conduit are required to plumb the nozzle cone on the skimmer pump to the pump in the tank (See Figure 8). These should be glued to prevent leaks, but construct it without gluing first to ensure all the conduit is at the right lengths.
At the skimmer pump end, the conduit can be connected to the nozzle cone using a short length of clear vinyl tubing, as above. As it will be external, 12-22 mm stainless steel hose clamps are needed to secure the tubing onto the nozzle cone as well as the conduit.
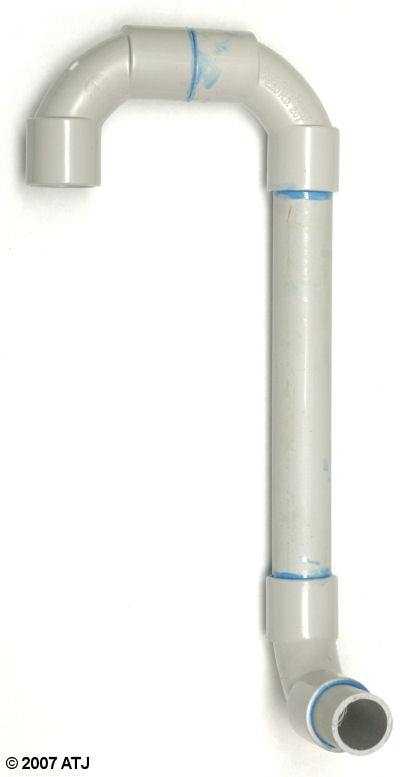
Figure 8: The constructed inlet extension.
An Aquarium Systems Mini-Jet MN404 pump is used in the tank to feed the skimmer. Two short lengths of clear vinyl tubing are used to get from the diameter of the outlet nozzle on the Mini-Jet (around 10 mm) to the inside of the last elbow (20 mm).
The final modification is to extend the outlet. Fortunately the outlet piping outside the skimmer can be replaced with a 20mm x 3/4" PVC socket valve (Figure 9) and then 20mm PVC pressure piping and fittings can be used.
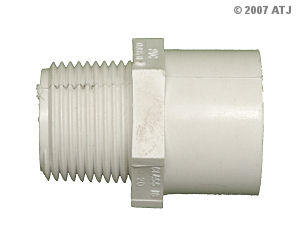
Figure 9: The 20mm x 3/4" PVC socket valve.
Three or four millimetres have to be to trimmed off the threaded end of the socket valve to allow a tight fit through the wall of the skimmer. Make sure the gasket is used to ensure a watertight seal. A 'T' is used directly after the socket valve with the centre of the 'T' facing up. This is to help shed air bubbles from the water. After the 'T' is a length of pipe to the tank which is terminated with a 45° elbow. A short length of pipe can be used after the elbow so the water doesn't have too high a fall. None of these pipes need to be glued, but plumbers tape is recommended to prevent leaks. The completed outlet can be seen in Figure 10.
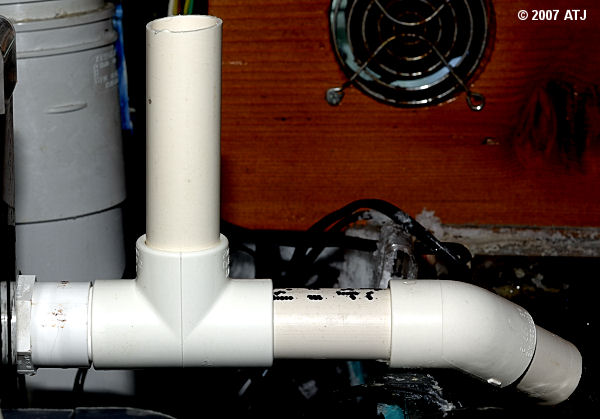
Figure 10: The modified outlet on 20G.
The modifiations work well and the skimmer is producing a good dark skimate (Figure 11).

Figure 11: The collection cup after 7 days of operation.
I'm using a BH-100 with the second set of modifications on my 20G tank.
Last updated: 14 October 2007